Self Assessment
User Manual

DeCYFIR ServiceNow

Introduction

The purpose of this User Manual is to provide knowledge to the users that how they can use/access the DeCYFIR alert, and incident details in the ServiceNow application.

The ServiceNow App is responsible for getting the raw alert data from DeCYFIR and creating corresponding incidents for it in ServiceNow. The app has a set of in-built reports against this alert data ingested.

The latest version of the app polls data using new endpoints for Attack Surface and Digital Risk with each subcategory subtype.

Modules

Below mentioned modules will be covered as part of this document.

  • Login
  • DeCYFIR Tenants
  • Scheduled Job
  • DeCYFIR Alerts
  • DeCYFIR Logs
  • Incidents
  • Dashboard

Scope

DeCYFIR ServiceNow application has the following key features:

  • A scheduler job which will poll for alert data using Cyfirma API on fixed intervals.
  • A custom alert table within ServiceNow to ingest the alert data.
  • A business rule to check if an Alert already has an associated incident in ServiceNow, else it will create a new Incident in the incident table within ServiceNow.
  • A list will be created for viewing the alert data from the custom alert table. This will be associated with an incident form to view the alerts related to each incident.
  • Inbuilt Reports
    • Count of alerts of each category.

Additional scope for the updated App to include Subcategories.

  • Add-on will poll CYFIRMA’s 1 REST endpoint with 6 different subtypes.
    • Domain/IP vulnerability
    • Certificate
    • Configurations
    • Open ports
    • Domain reputation
    • Open bucket

    at the defined interval to fetch the CYFIRMA’s Attack Surface sub-categories data and ingest into Servicenow Alerts table with Subcategory set as “cip:attack_surface:<sub category>”

  • Add-on will poll CYFIRMA’s 1 REST endpoint with 6 different subtypes
    • Impersonation & Brand Infringement
      • Domain/IT assets
      • Execute/ people.
      • Social handler
      • Product/solution
    • Data Breach
      • Phishing
      • Ransomware

    at the defined interval to fetch the CYFIRMA’s Digital Risk sub-categories data and ingest into ServiceNow Alerts table with source type set as “cip:digital_risk:<sub category>”

Login

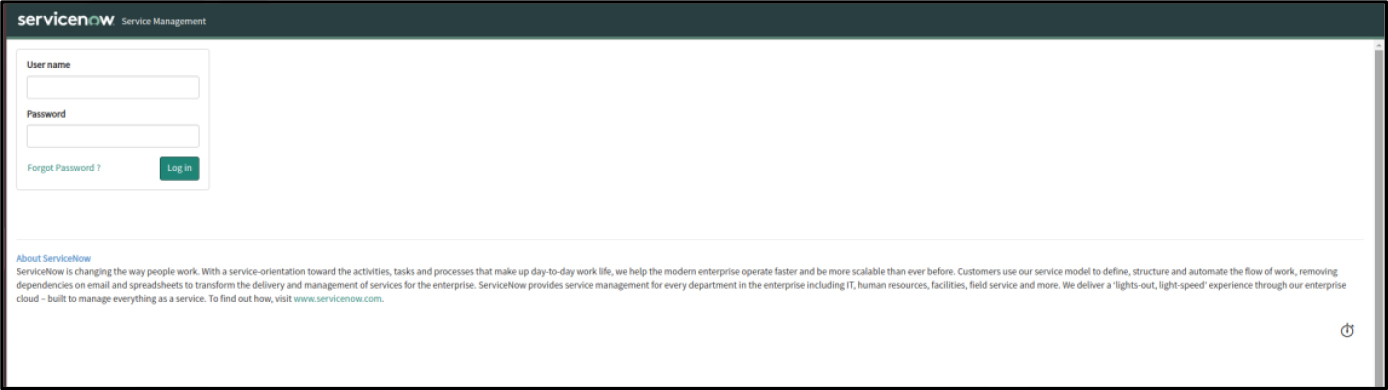
Once you launch the URL, it will take you to the below-mentioned home page, enter the User Name, Password & click the “Login” button.

URL e.g: https://ven04915.service-now.com/

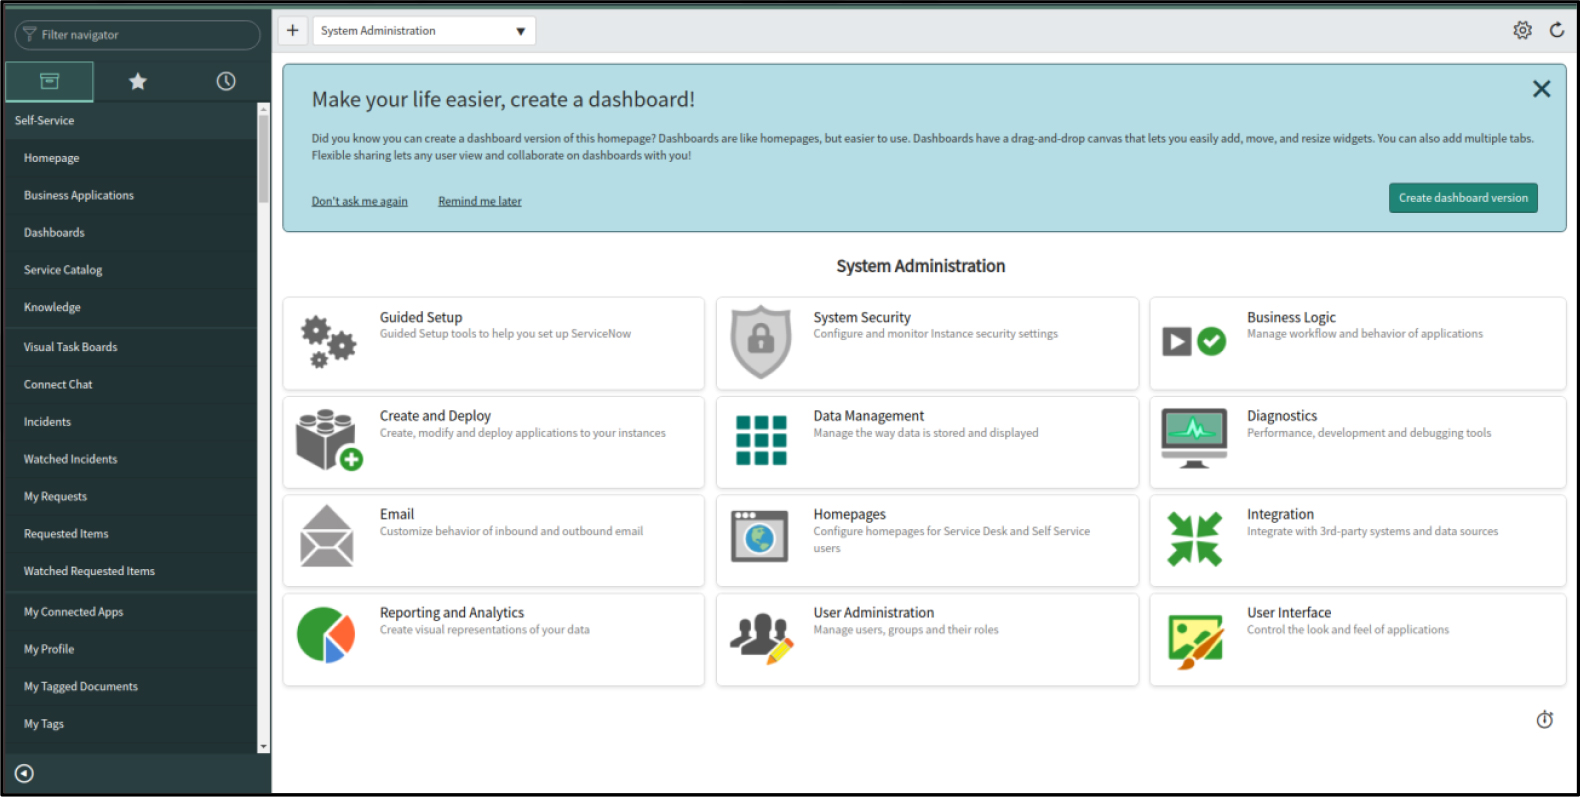
This will take you to the home page.

DeCYFIR Tenants

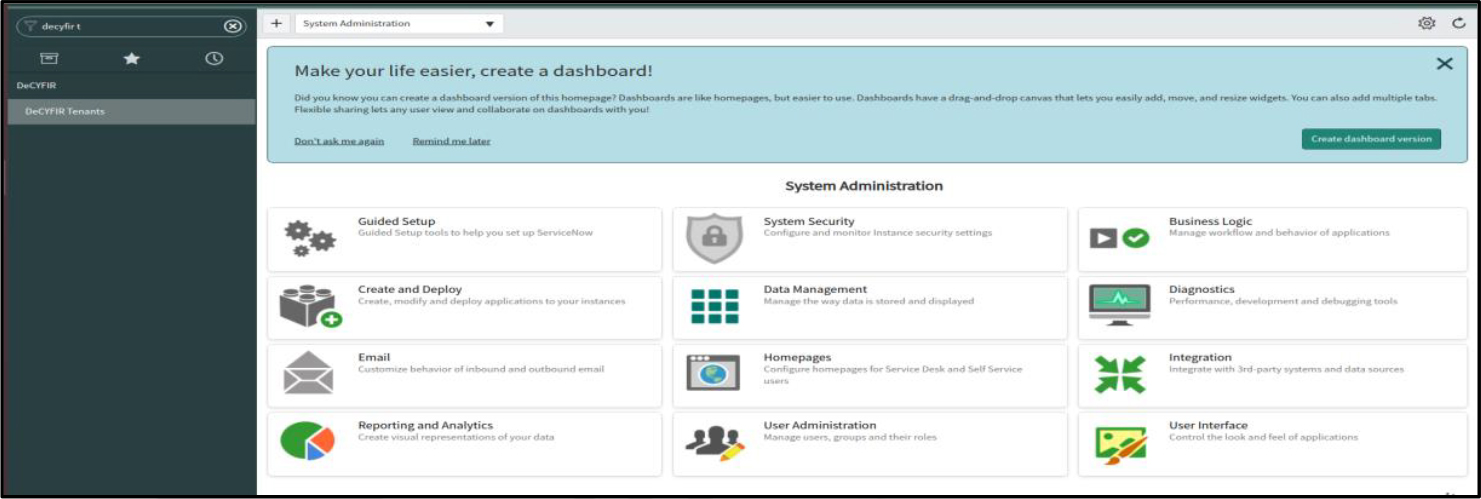
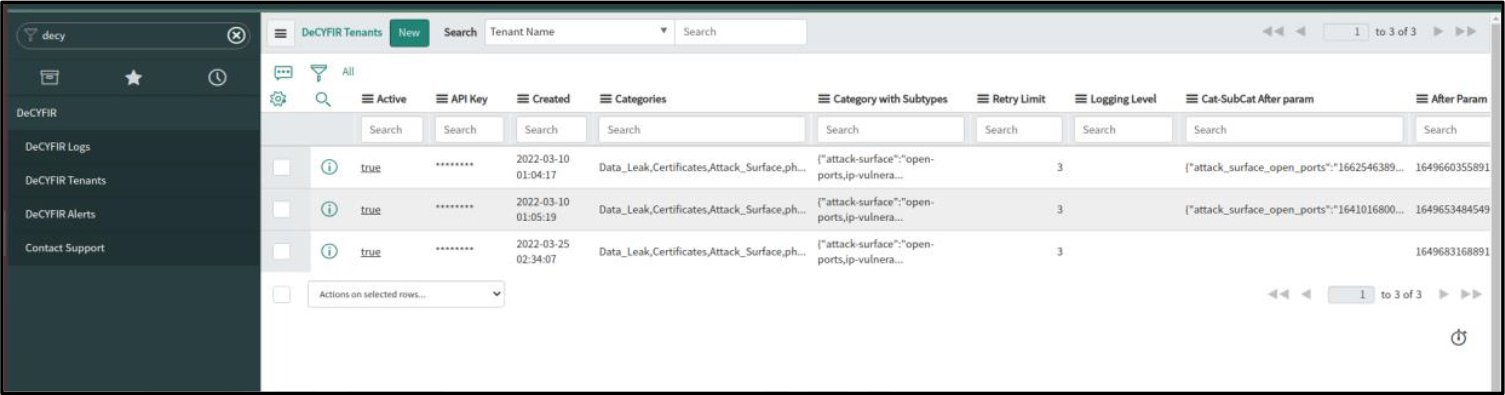
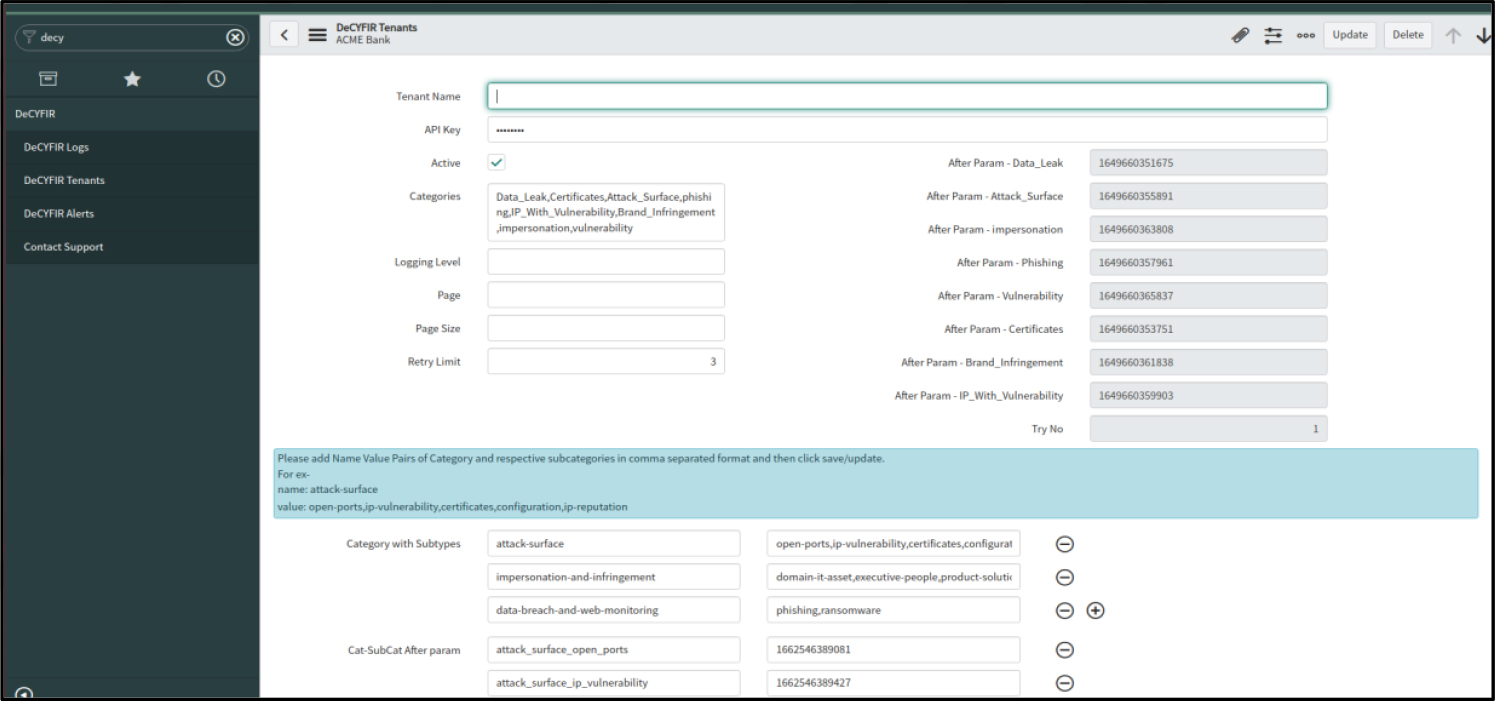
Users can store the information for multiple Companies or Tenants in the Tenant table.

  • Navigating to the Tenant page:
    Go to “Filter navigator”(left-hand side up) and search for “DeCYFIR Tenants” and click on it.

Categories:
We have two categories.

  • Attack Surface
  • Digital Risk

Subcategories:

  • There are six subcategories that come under Attack Surface
    • Domain/IP vulnerability
    • Certificate
    • Configurations
    • Open ports
    • Domain reputation
    • Open bucket
  • There are six subcategories which come under Digital Risk
    • Impersonation and Brand Infringement
      • Domain/IT assets
      • Execute/ people
      • Social handler
      • Product/solution
    • Data Breach
      • Phishing
      • Ransomware
  • Users have the option to add or remove the categories which they want. e.g.: If the admin/end-user wants only “Attack Surface-IP vulnerability” alerts means they can just give that category subcategory, updating the changes & the system will fetch that alert only.

Steps to add the Category-Subcategory to the Tenant’s record.

  • Click on the row in the Tenant table that will open the detailed page where the user is able to see the fields and values for active or inactive tenants.
  • Now you can add Name value pairs of Category and respective subcategories in comma-separated format and then click on the update button.
    For e.g.name: attack-surface
    value: open-ports,ip-vulnerability, certificates, configuration,ip-reputation
    • After Parameter: This will capture the time of the Last job schedule in Unix format, whenever the net job runs, it will consider the Last captured time & from that time onwards the system will start to fetch the data. This time will be captured for all the Categories and Subcategories separately.
    • API Key: This is the password where it will be used to establish the connectivity between Cyfirma & SNOW.
    • Logging Level: Users have the option to configure what type of log they need to analyse.
    • Retry: Users can configure this to achieve that whenever an issue occurs, how many times the system needs to retry to perform the activity. By default, it’s configured as 3.

Scheduled Job

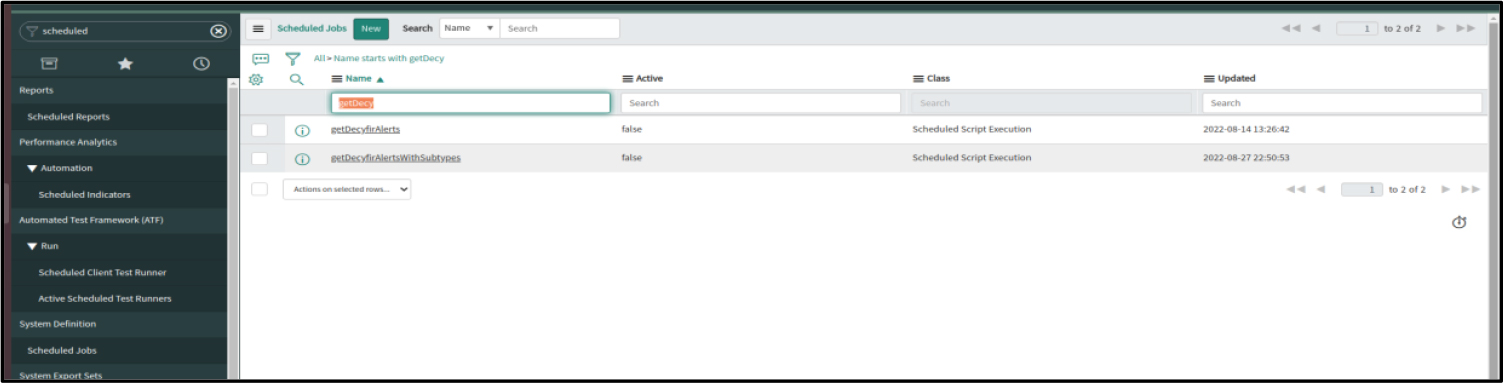
Users can set this at what time/interval the job must run to fetch the alerts from the “Cyfirma” system & this is an automated process. If the user wants to run at any time, they just need to click on the “Execute Now” button, this will instantly trigger the job.

Follow the below steps to schedule job.

  • Go to “Filter navigator”(left-hand side up) and search for Scheduled Jobs(which is under System Definition) and click on it.
  • Search for “getDecyfirAlertsWithSubtypes” in the top search field
  • Click on “getDecyfirAlertsWithSubtypes”
  • Scheduled script execution getDecyfirAlertsWithSubtypes page will be displayed
  • Users can configure it to run “Daily”, “Weekly”, “Monthly” etc by using the “Run” dropdown
  • Click on the “Execute Now” button to run the job

DeCYFIR Alerts

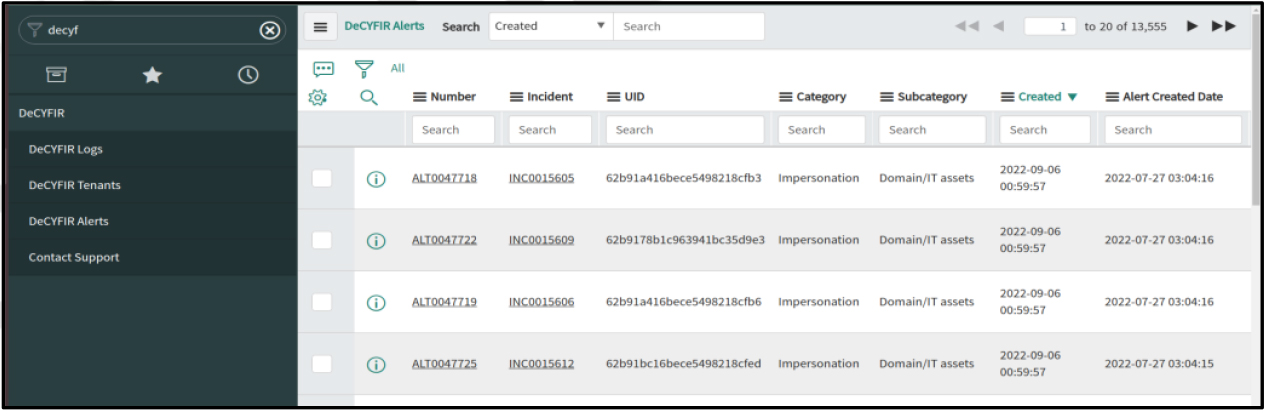
Users can see all the alerts received from the Cyfirma system on the “Alerts” page, each alert will have a unique “Alert” and “Incident”. For each alert there will be a new incident created.

Navigating to the Alert page:
Go to “Filter navigator”(left-hand side up) and search for “DeCYFIR Alerts” and click on it.

Click on “DeCYFIR Alerts”, which will open the “DeCYFIR Alerts” page.

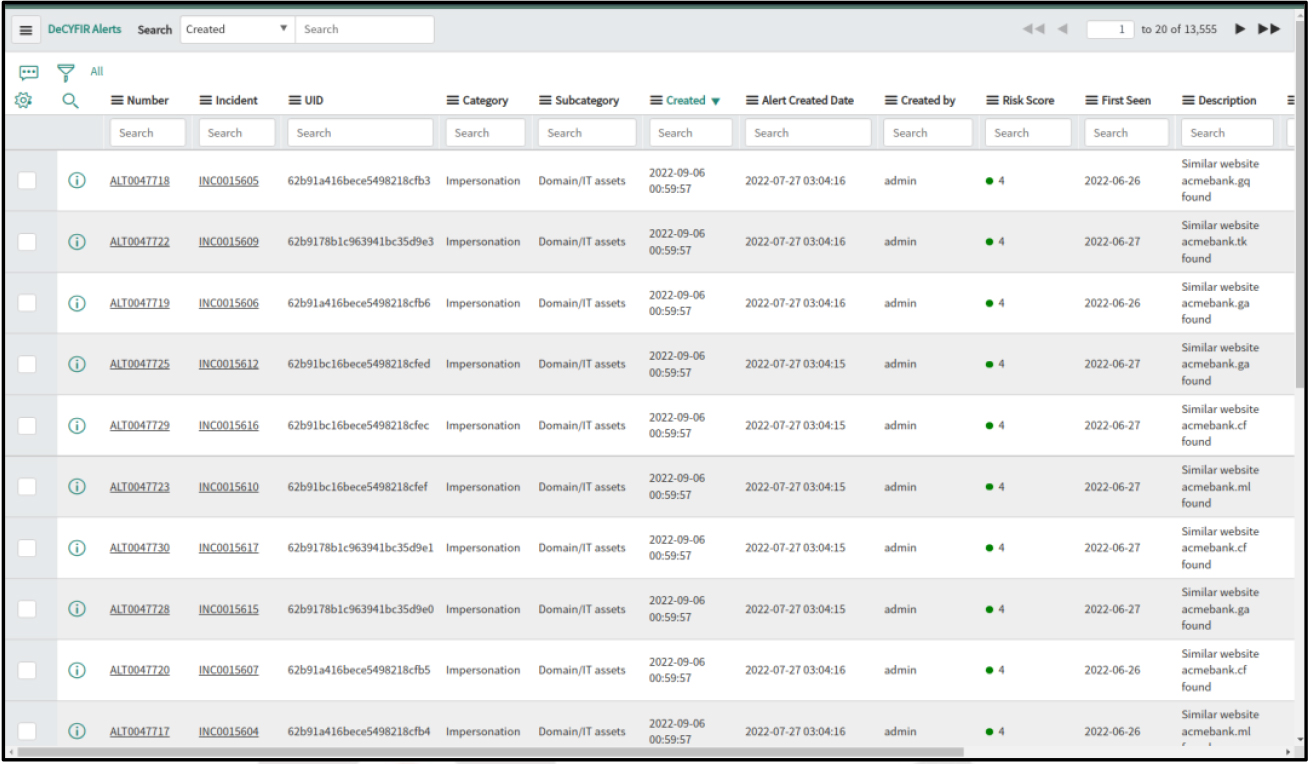
Users can also view the Alerts for specific Subtypes by using the “Groupby>Subcategory” filter.

If you click on the “Alert” number that will open the detailed page where the user is able to see the fields and their value including Category and Subcategory. Similarly, for each alert there will be a unique incident generated.

Incidents

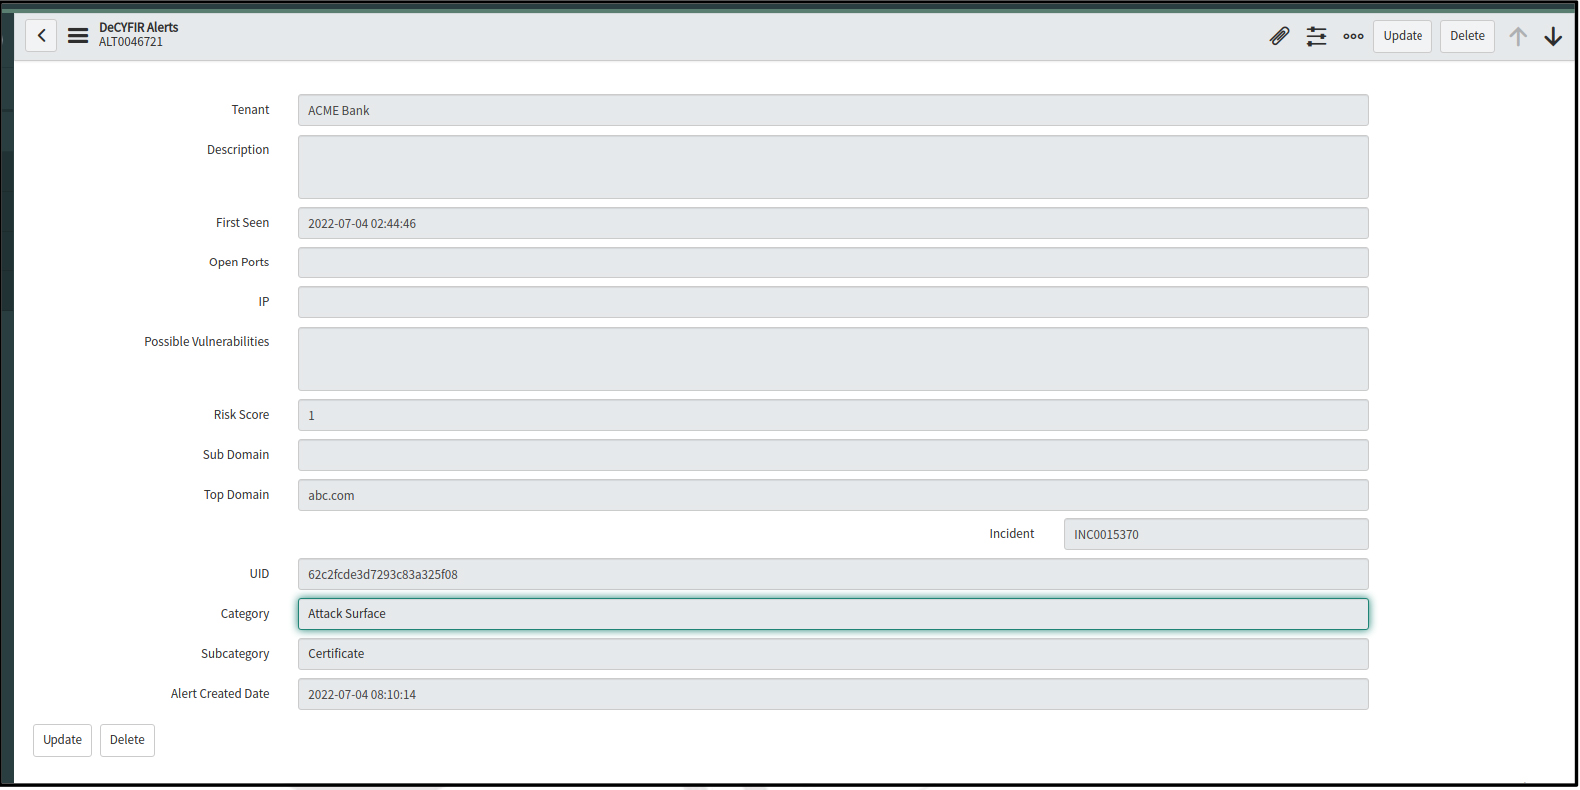
For each alert there will be a unique Incident ID generated.

  • Accessing the incident: Users can see the incidents associated with each and every alert, by clicking the incident number, which will take the users to the incident page.
  • Navigating to the Incident page: If you click on the “Incident” number from the DeCYFIR Alerts table that will take you to the incident page & user can see the details like impact, urgency, Description, etc.

Under work notes, users can see all the alert fields and their associated values.

Under Related links>DeCYFIR Alerts, the user can see the alerts which are associated with that Incident.

DeCYFIR Logs

All the system activity will be captured in logs.

Navigating to the Log page:
Go to “Filter navigator”(left-hand side up) and search for “DeCYFIR Logs” and click on it.

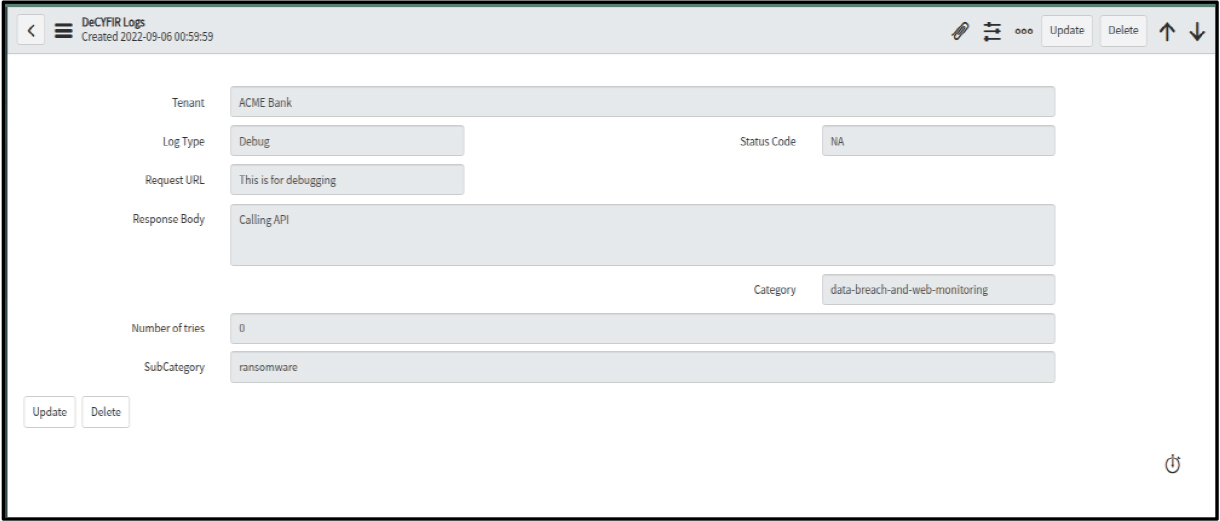
Click on “DeCYFIR Logs”, which will open the “DeCYFIR Logs” page.

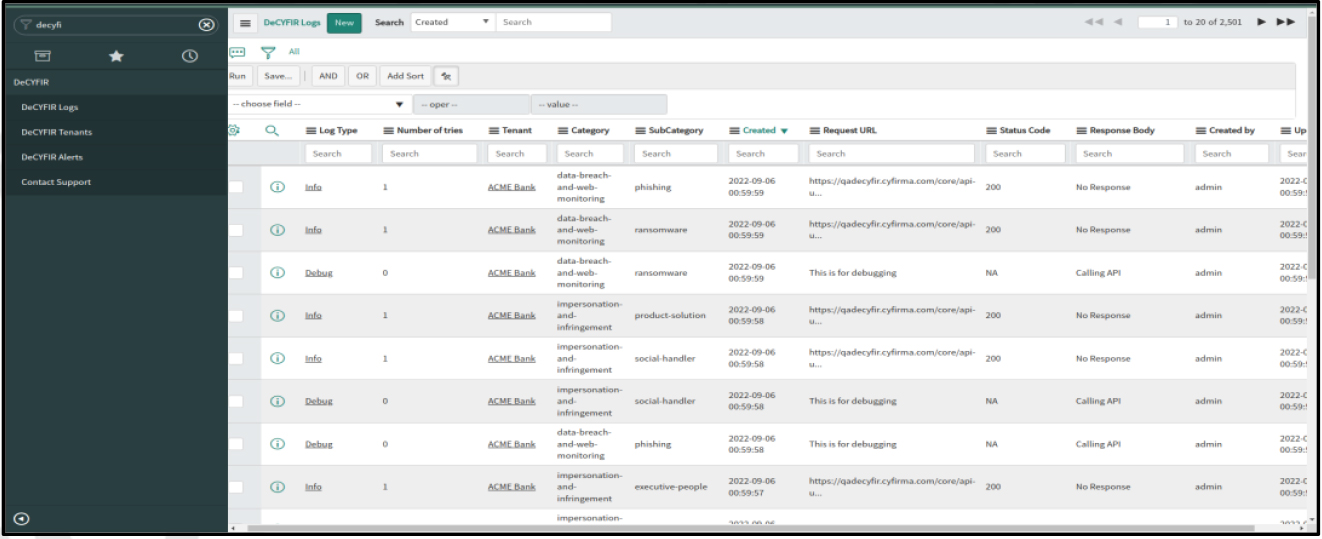
If you click on any of the “Log types” that will open the detailed page where the user is able to see the Tenant, Log type, Status code, Request URL, Response Body, Category, Subcategory, and Number of tries.

Dashboard

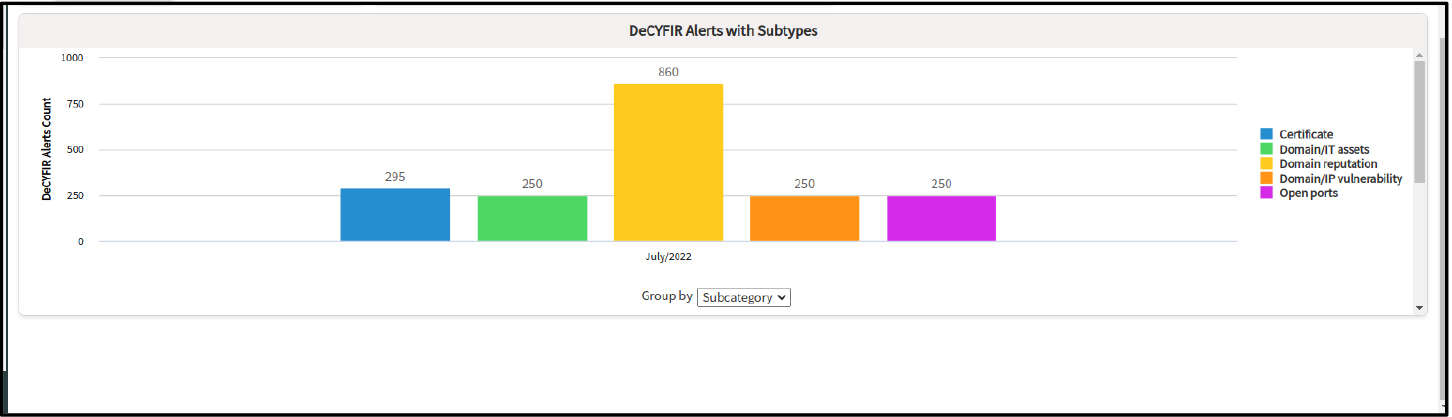
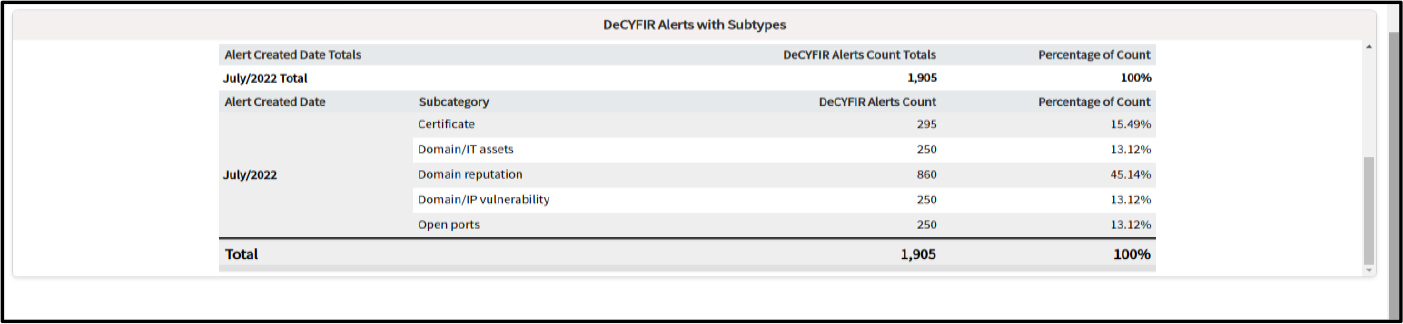
Users are able to see all the category-subcategory alerts and their counts.

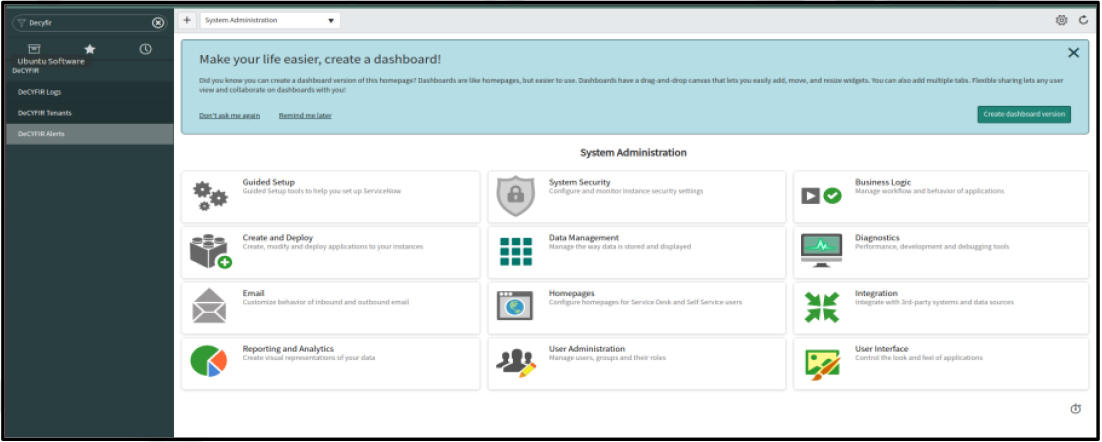
Navigating to the dashboard page:
Go to “Filter navigator”(left-hand side up) and search for “Dashboards” and click on Dashboards which is under “Self-Service”.”

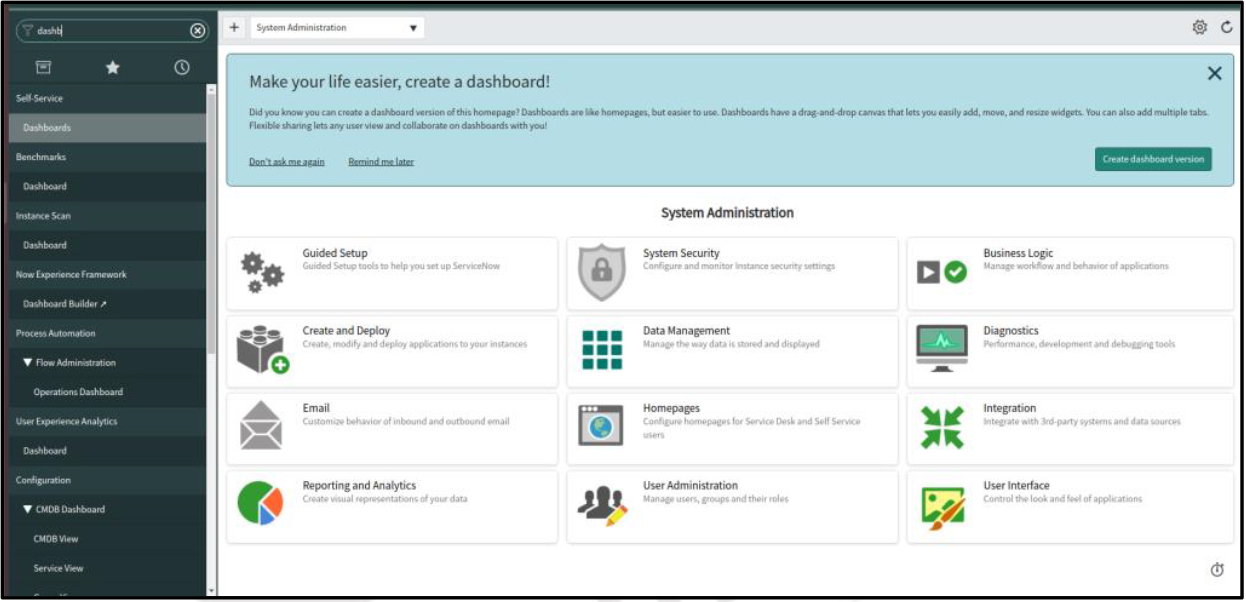
It will take the user to the below page and then click on “DeCYFIR Alerts”.

Users will be able to see this page which shows a count of alerts for both the categories-subcategories and their count.

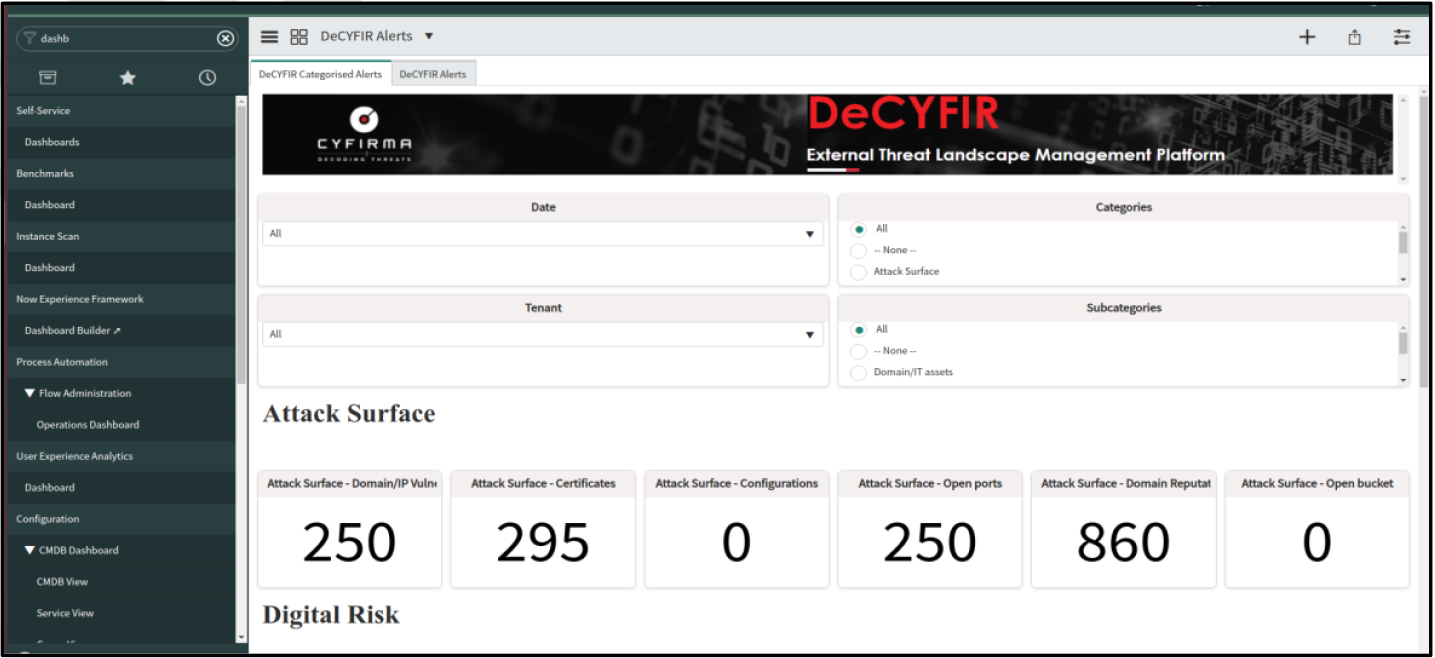
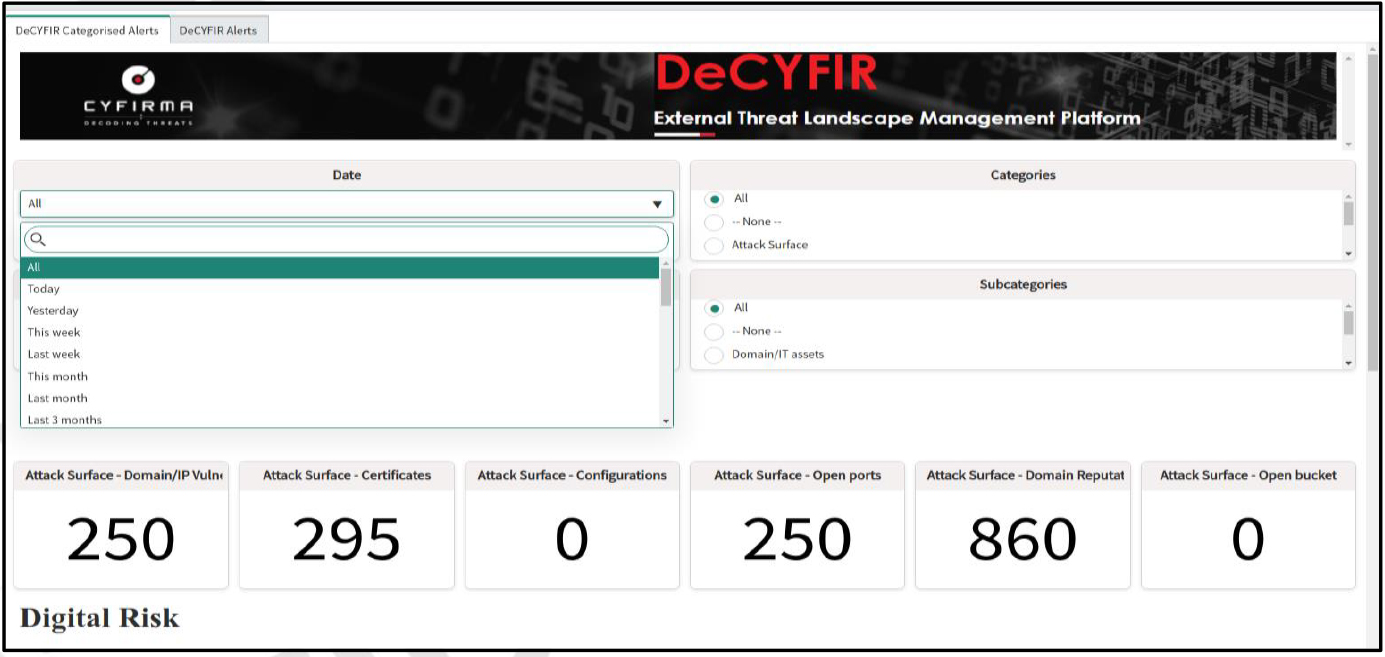
Users have the “Date” filter to filter the Alerts for different time ranges.

Users have the “Tenant” filter to filter the Alerts for different tenants.

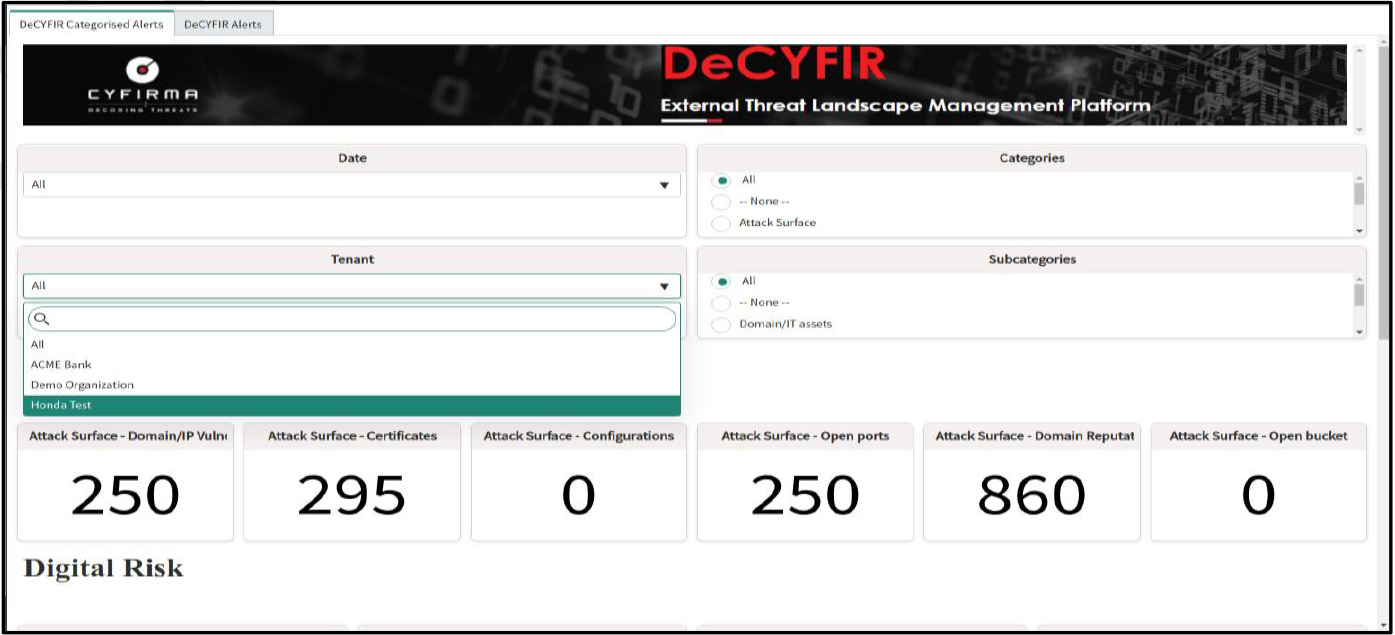
Users have the “Category” filter to filter the Alerts for different categories.

Users have the “Subcategory” filter to filter the Alerts for different subcategories.

Users can see the count of Alerts on the page below the Graph based on the filter selected.

If the user clicks on any score card, then he will be redirected to the DeCYFIR Alerts table which shows the latest alerts based on the selection criteria.

This site is registered on wpml.org as a development site. Switch to a production site key to remove this banner.